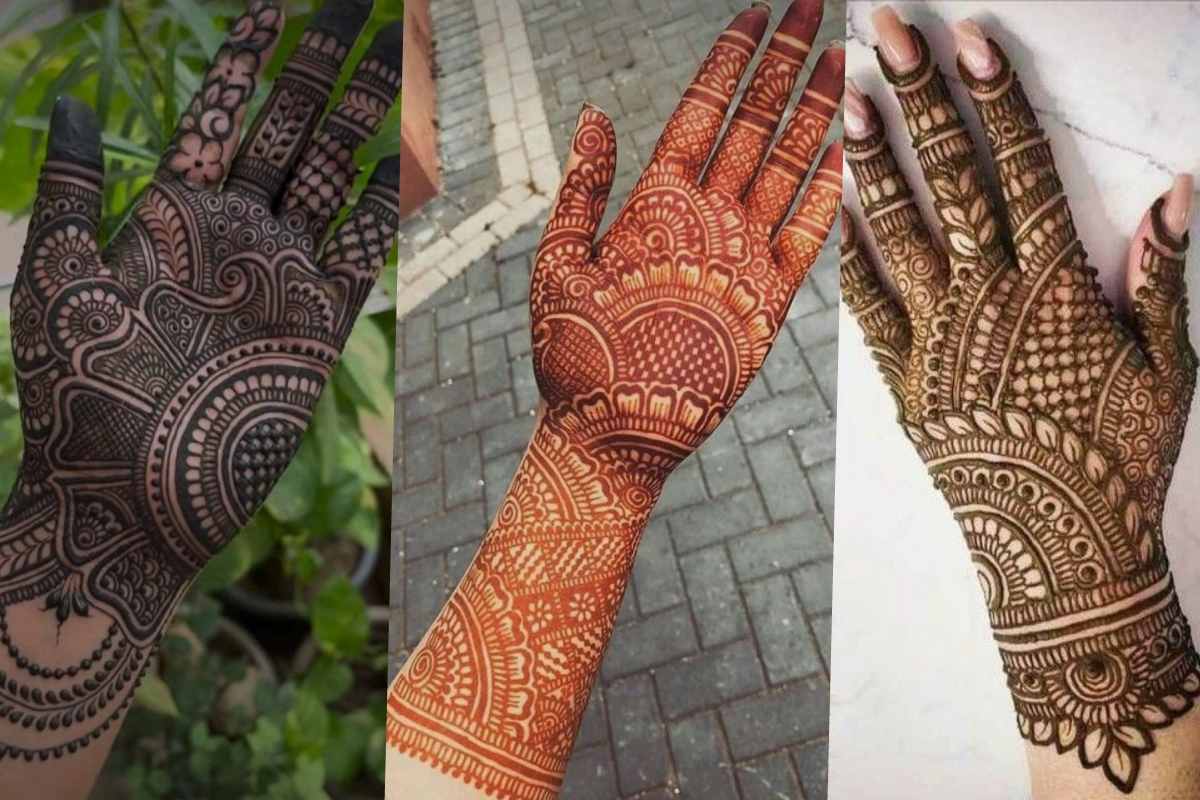
Easy Mehndi Design Front Hand – Hey there! I’m excited to share some stunning yet simple Mehndi designs that’ll make your hands look gorgeous.
As someone who’s been practicing and teaching Mehndi art for years, I know how overwhelming it can feel when you’re just starting.
But don’t worry – I’ve got your back with some super achievable designs that’ll make you look like a pro.
Table of Contents
Why Start with Front Hand Designs?
The front of your hand is like a perfect canvas for beginners.
It’s easier to work on because you can see exactly what you’re doing.
Plus, it’s the part everyone sees first when you’re showing off your mehndi!
Essential Tools You’ll Need
Before we dive into the designs, let’s make sure you have everything ready:
Fresh henna paste (look for that dark green color)
A fine-tipped applicator cone
Eucalyptus oil (helps the color develop better)
Cotton balls and lemon juice solution
Paper towels for cleanup
Easy Mehndi Design Front Hand Elements to Master
Let’s break down some basic patterns that you can mix and match:
1. The Classic Flower
Start with a small circle in the center
Add petals around it – don’t worry about making them perfect
Fill in with tiny dots for extra charm
2. Basic Vine Pattern
Draw a single curved line across your hand
Add small leaves on both sides
This makes a beautiful base for other designs
3. Dot Work Magic
Create clusters of dots in triangle shapes
Use them to fill empty spaces
They’re super forgiving if you make mistakes
Step-by-Step Beginner Design
Here’s my favorite easy design that always gets compliments:
Start at the center of your palm
Draw a simple flower using the technique we discussed
Create a vine that curves toward your wrist
Add smaller flowers along the vine
Fill empty spaces with delicate dots
Pro Tips for Better Results
Always clean your hands with soap and water before starting
Keep your hand super steady while applying
Practice the basic shapes on paper first
Less is more when you’re beginning
Let the design dry naturally – no fanning or heat
Common Mistakes to Avoid
Rushing through the design (take your time!)
Making patterns too complicated
Applying the henna too thick
Not letting it dry completely
Washing it off too soon
Aftercare for Longer-Lasting Color
Leave the henna on for at least 4-6 hours
Apply a mix of lemon juice and sugar while it’s drying
Avoid water for 24 hours after removing the paste
Keep your hands moisturized
Seasonal Design Ideas
Summer Vibes
Light, airy patterns with lots of space between elements
Small flowers and leaves scattered around
Wedding Season
Slightly more detailed but still manageable designs
Focus on traditional elements like peacocks and mangoes
Frequently Asked Questions
Q: How long should I practice before trying more complex designs?
A: Start with basic elements for about 2-3 weeks before moving to more intricate patterns.
Q: Can I create these designs with henna cones from the store?
A: Yes! Store-bought cones work great for beginners. Just make sure they’re fresh.
Q: How long will these designs last?
A: With proper aftercare, these designs typically last 1-2 weeks.
Q: What if I make a mistake?
A: No worries! You can usually clean it up with a Q-tip dipped in lemon juice while it’s still wet.
Q: Is it normal for the color to look different on different people?
A: Absolutely! Color development varies based on skin type and body temperature.
When to Level Up
Once you can draw steady lines
After you’re comfortable with basic shapes
When your simple designs look neat and clean
Remember, everyone starts somewhere, and these easy designs can look just as beautiful as complex ones.
The key is practice and patience – you’ve got this!
Keep practicing these basic designs until they become second nature, then you can start adding your creative twists.
Want to see more design inspiration? Check out my other tutorials on mandala patterns and bridal mehendi designs!
Let me know in the comments which design you’re excited to try first!

